|
|
|
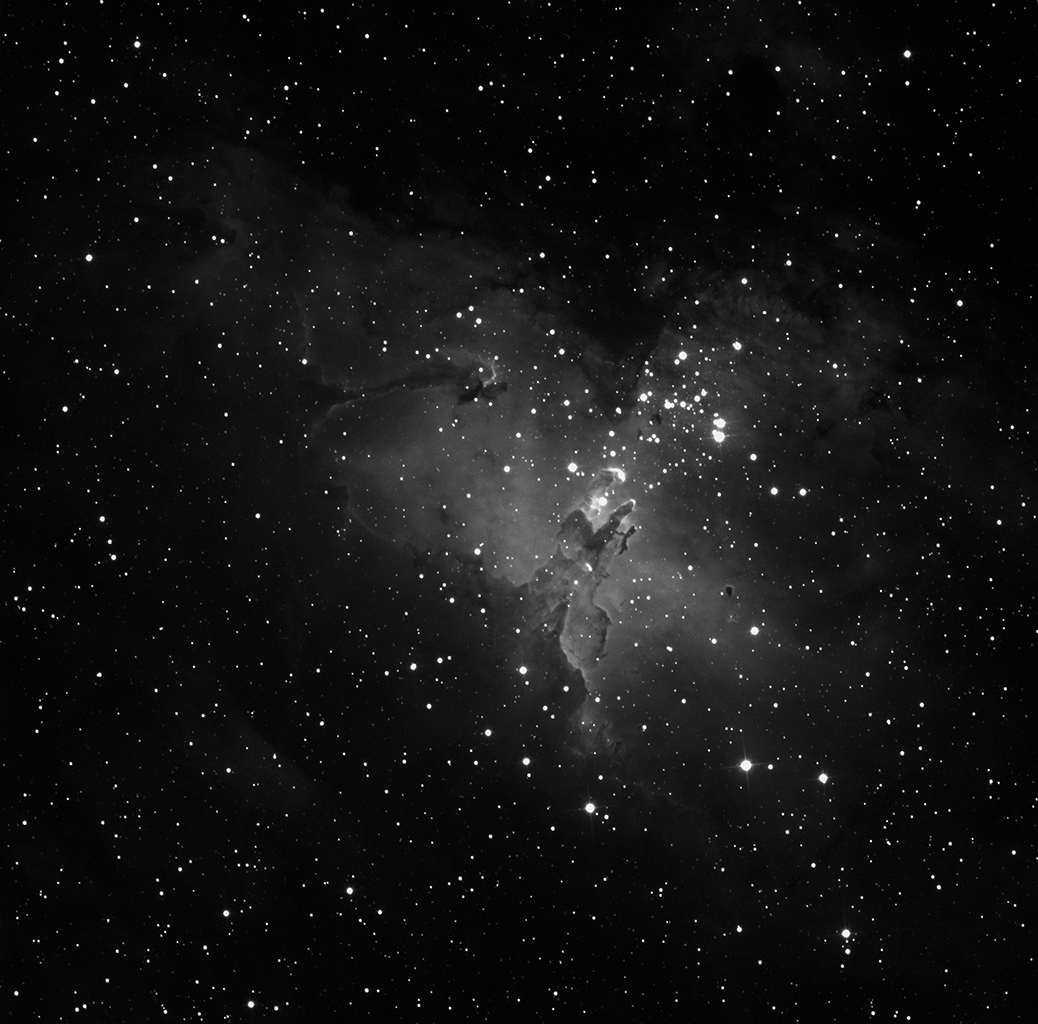
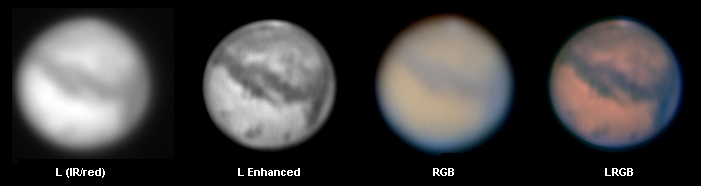
Composites by Examples LRGB imaging is nothing else than a conventional combination or stacking of 3 monochrom channels, Red (R), Green (G) and Blue (B) with several high quality grayscale images of the same object, called the (L)uminance, to increase the contrast. Invented by Okano Kunihiko, the LRGB processing is quite simple but requests in this peculiar case either a CCD with a filter wheel (e.g. SBIG CFW-8A or FLI CFW2-7) and many patience or a software able to split the color channels if you use a webcam or a color CCD. Of course, there is always the manual option much cheaper consisting in recording black and white pictures under colored filter (R, G, B filters) completed with a B/W picture in white light for the luminance.
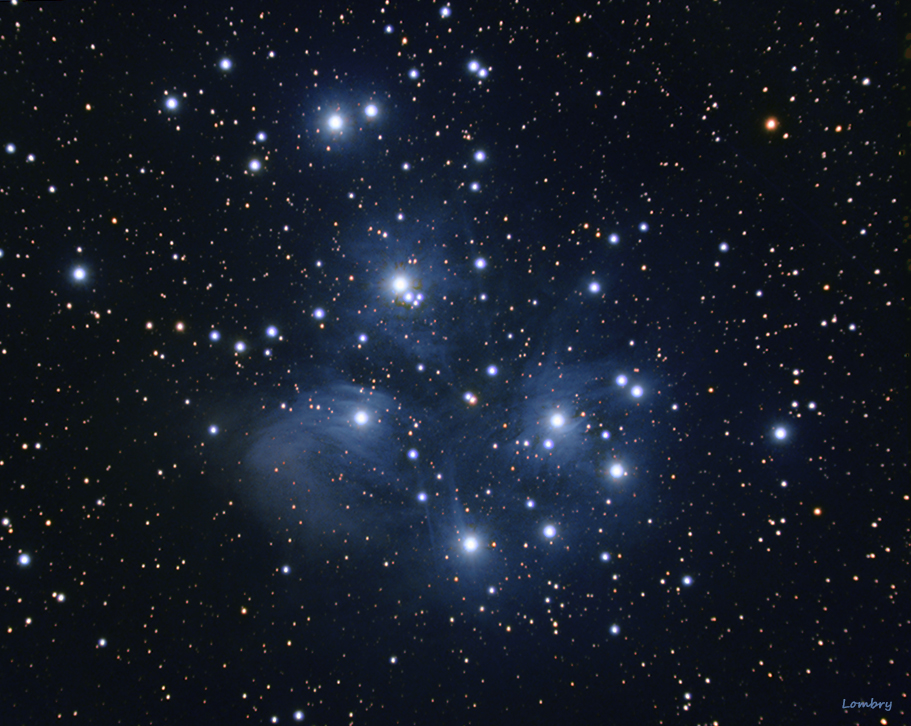
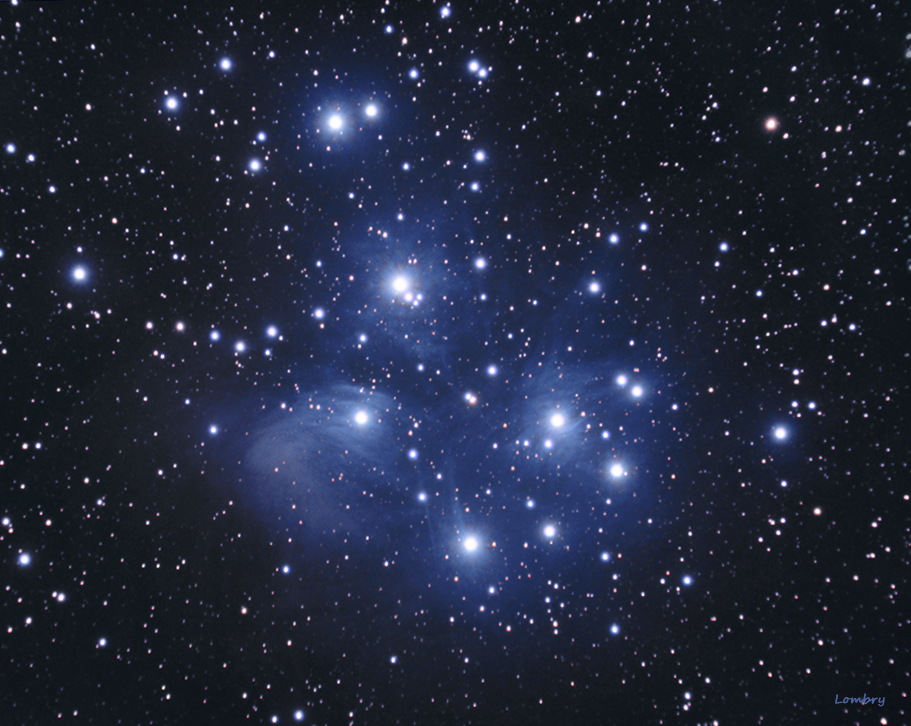
If the use of a color CCD can be very efficient in astrophotography, all the more that new models are very compacts, the LRGB resulting image is nothing else than a colorized black and white picture in which the lightest tones are often vanished. It is especially the case in planetary astrophotography. Indeed, if we take the example the astrophotography of Mars, as the luminance image is usually made in red or IR light, often the lightest blue haze or yellow and white clouds are removed from the RGB picture by the luminance component. Worse, the overall color of the planet is shifted from reddish to the orangeous-pinky color or becomes even grey-pink (see the gallery in French). Hopefully, this issue specific to color CCDs does not occur in picturing deep sky objects (cf. the image galleries of nebulae and galaxies taken with QHY and ZWO color CCDs). So, to get a true LRGB picture, the luminance must be recorded in visible light, exceptionally in red light using a wide band filter but never in monochromatic light, except if you want to get a special effect. Therefore CCD cameras are more suited to that usage than webcams. A cooled CCD to reduce the electronic noise will satisfy all demanding amateurs, still more if you can add color filter wheel, an optional adaptive optics and a possible derotator if you use a fork mount. STRETCHING Astrophotography in Photoshop Using Curves and Levels To read : The True Color of the Pleiades Nebulosity, Roger N. Clark
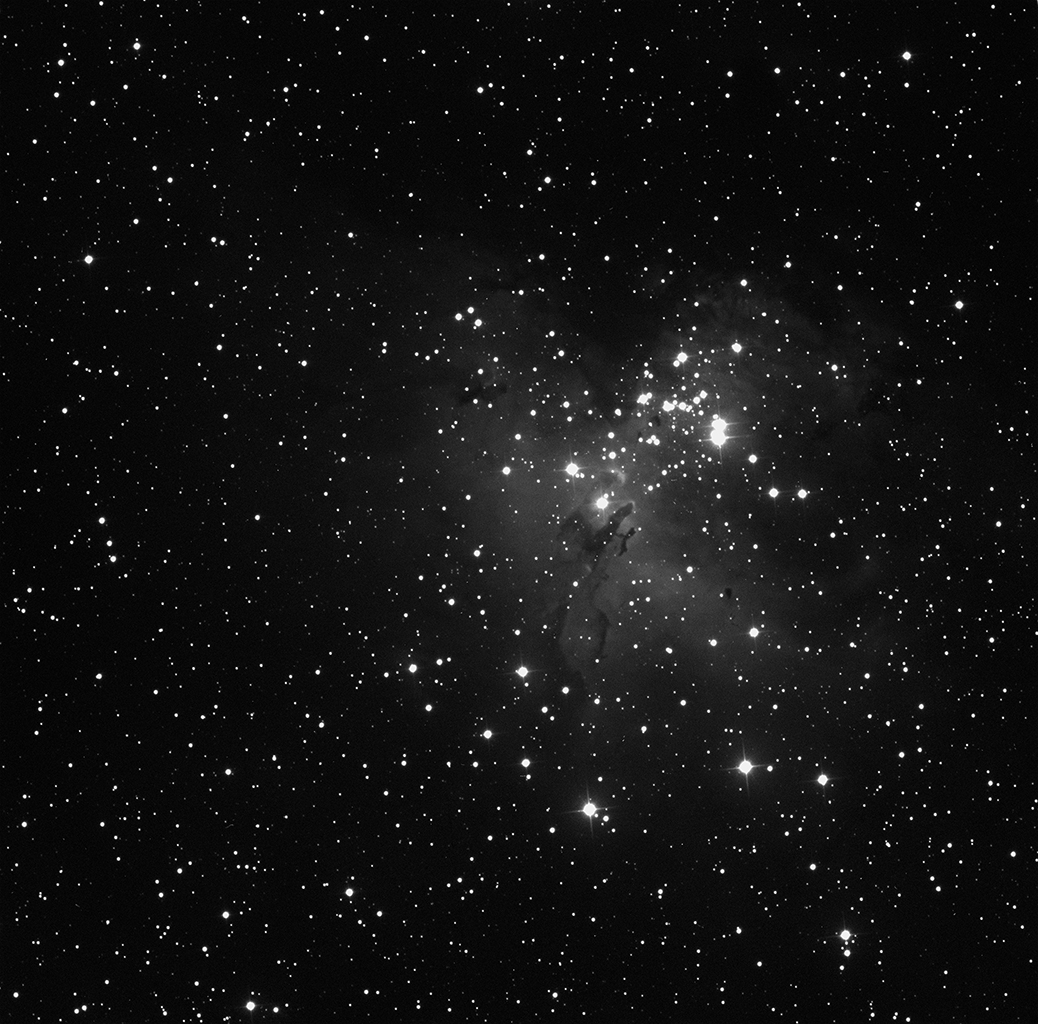
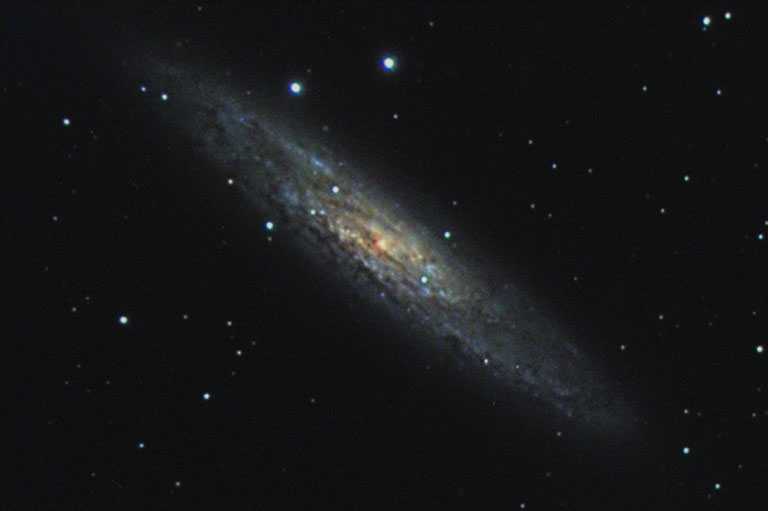
Picturing DSO In deep-sky astrophotography, the time exposure already long for a single monochrom image (a total integration time of some tens of minutes) must be multiplied by four to get a LRGB image and reached a total of 82 minutes for NGC 253. If you want for example picturing bright galaxies with a 128 mm apochromat equipped with a monochrom CCD, most amateurs use the next combination : R = G = B = 1x 5 minutes exposure to 6x 30 minutes exposure for each channel plus at least 1 luminance (B/W) image exposed between 20 minutes anda few hours if you can benefit of a very dark sky (close to a desert, in a national park or in high altitude or any location plunged into full darkness). If the focusing, tracking and seeing are perfect, the resulting LRGB image will be stunning of colors and very crisper of details ! To reach that time without the slightest tracking error which is mandatory photographying DSO's, Okano Kunihiko has used a sturdy Takahashi EM200 german mount, one of the few to insure an accurate tracking compatible with the small size of the ST-7 detector (9 microns pixels). To
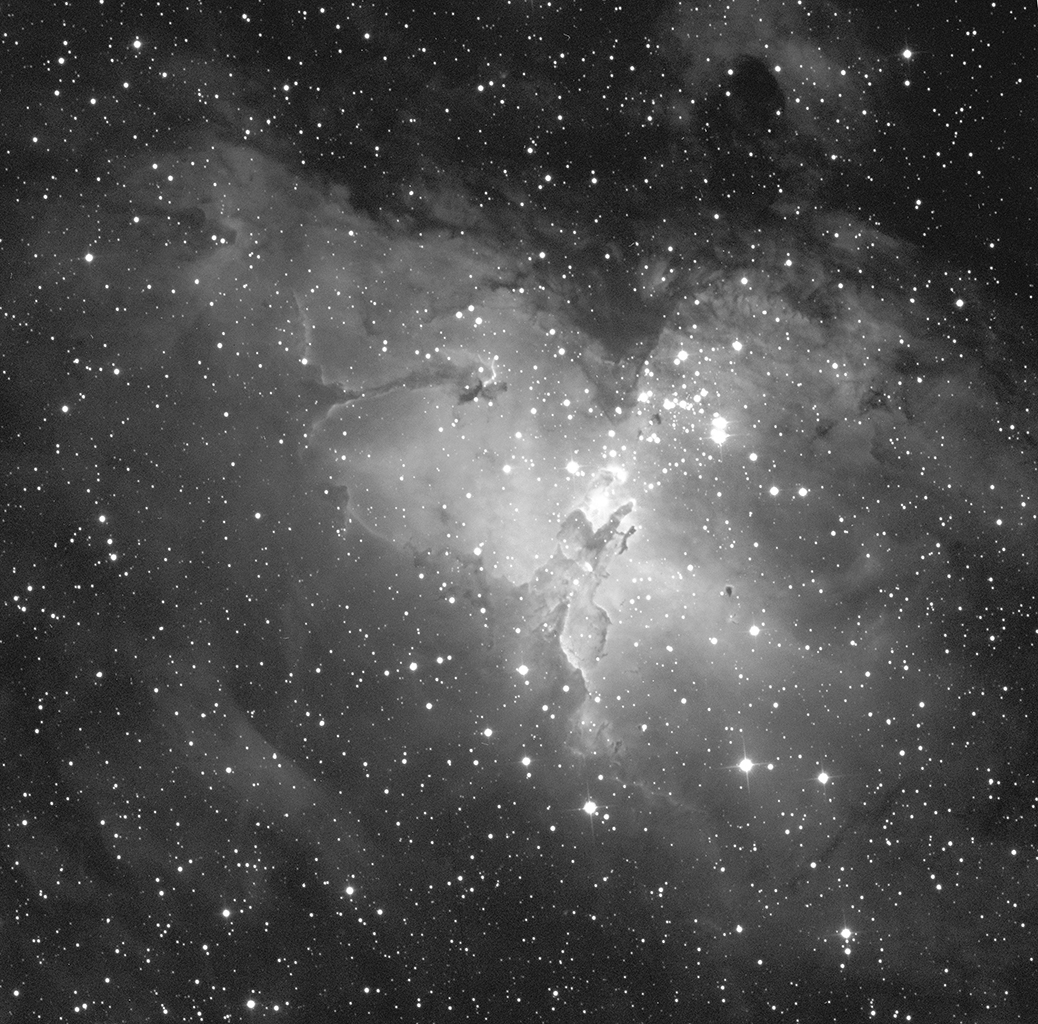
see : Convert Gray Images Into RGB Color
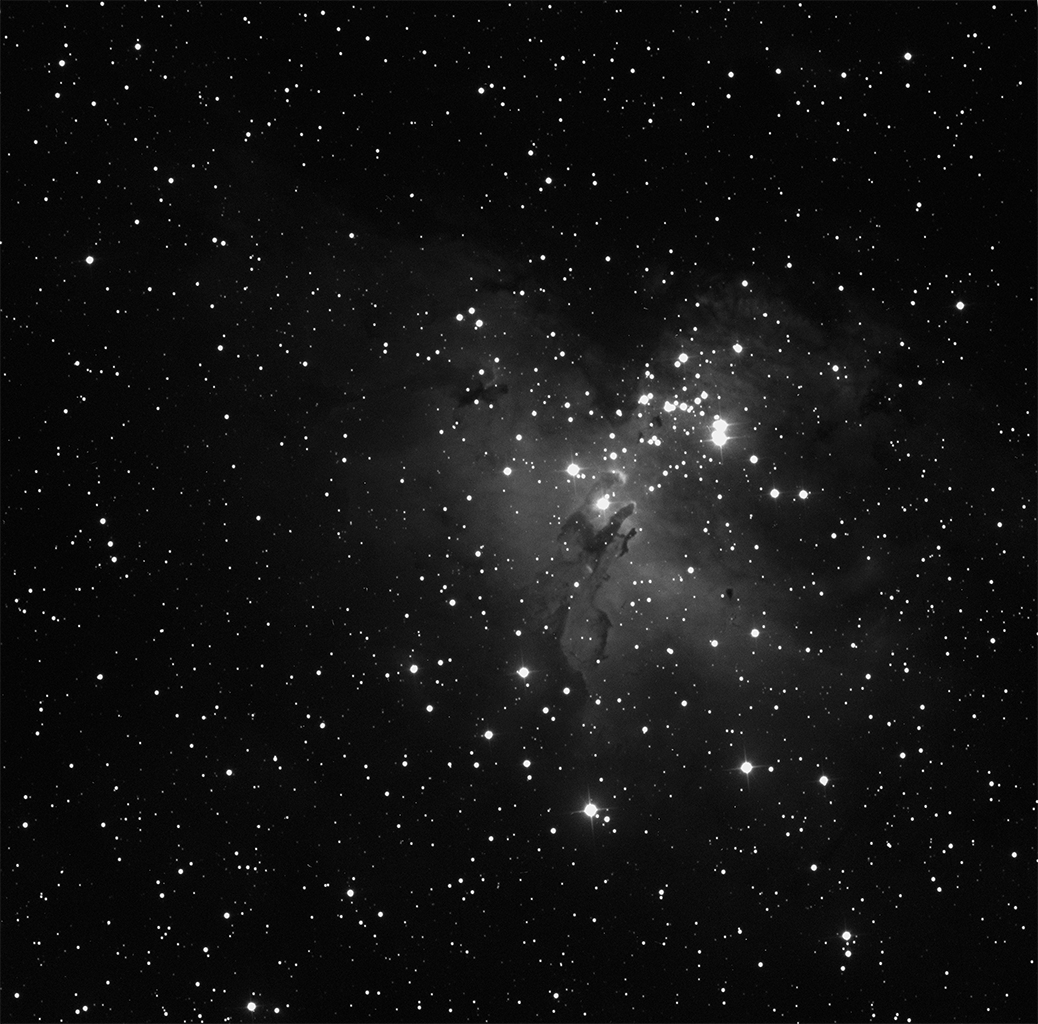
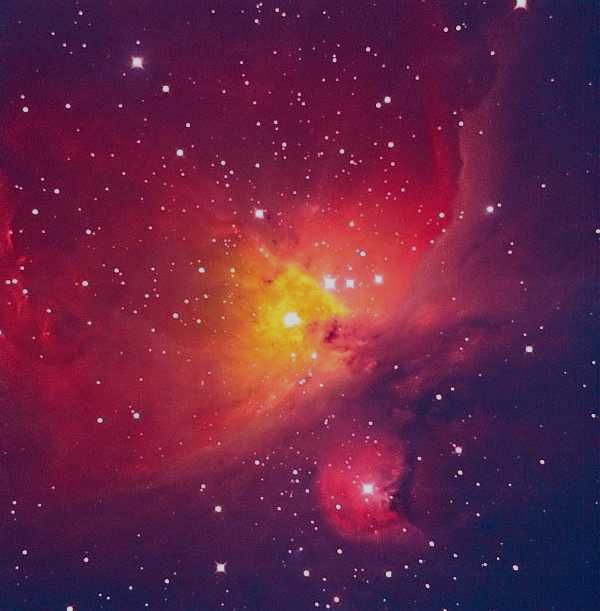
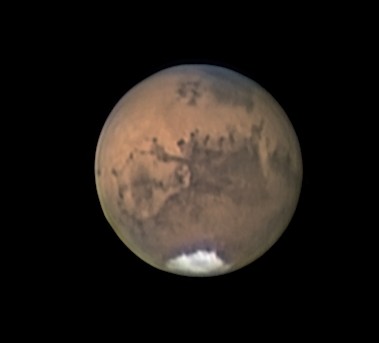
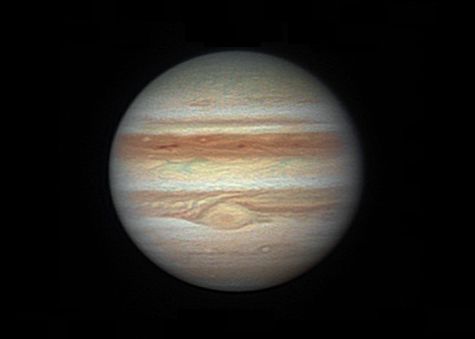
Of course such a sturdy mount and a high-cost CCD are not mandatory to take LRGB pictures (DSO's or planets), but in the field you will soon discover all advantages of using a robust installation, free of vibration and gambling, even if you work with the lightest webcam. In this context most high-end Takahashi, Losmandy or Astro-Physics mounts are recommended. Smaller one like Sky-Wachter (Kepler) EQ6 or GT-One are interesting but most lack by default of accurate error corrections capabilities (PEC and Direct Drive are excessive). The image of M42 is another story and a true performance. This is a mixing of analog and digital technique, the RGB having requested a 180 minutes total exposure due the very low sensitivity of the Kodak Ektar 25 (ISO 25). Once the four images acquired and upload into the computer, the goal was to reduce the "noise" presents in the RGB channels. Then a very special technique has been used. The image recorded on an ultra fine grain emulsion has been used as RGB channel, and the image taken with the HPC-1 CCD and infrared filter (passband over 700 nm) has been used for the Luminance. As a result, more "warm" stars appeared. The reddish ones are probably behind or into the bright nebula. As says Okano Kunihiko, "Now, you can see a lot of stars 'through' the Orion Nebula !" In the LRGB composite of NGC253, only the color information was extracted from the RGB channels, while the "colored" noise was suppressed using a high-pass filter to produce a final composite much clear, which luminance comes from the high-gain grayscale image. The resulting picture displays more saturated colors and a more aesthetic image. Picturing planets The LRGB technique can be successfully applied to planetary astrophotography too. The principle is merging from some hundreds to some thousands RGB pictures of a planet with some hundreds of B/W ones to create the Luminance layer. Due to the high contrast of the luminance frame, the overall image will be crisper, more detailled and much more contrasted than an ordinary RGB picture.
This technique is mainly used by advanced astrophotographers using a webcam or a CCD. This last is the most suited to this method as it can be equipped with a color filters wheel to get the individual LRGB frames that will be postprocessed. The most experimented amateurs using small scopes (100-150 mm) do no hesitate to stack up to thousands individuals frames to get a LRGB composite whereas users of larger scopes (300-450 mm) stack less than 50 images to get a similar result. All the skill comes in fact from the experience in the field and from the processing on the computer. As for all astronomical subjects, the best snapshots are the ones recorded by a clear and dark night, with very low turbulence under the best seeing. Additionnaly I suggest you to increase your focal ratio using a 2x Barlow or a Tele Vue Powermate 2.5x or higher. If there is the slightest trace of turbulence or a problem of focusing, be sure that the marvellous features you spent many times to record in hundreds exposures will be vanished in a fuzzy blob. Therefore some amateurs do not hesitate to use webcams and to record small animations of about 3 minuts at a rate of 10 frames per second (you get 1800 frames) and to extract the best frames that they stack.
Some software like Registax from Cor Berrevoets can combine or stack automatically the 4 LRGB frames without splitting them in individual channels. Others amateurs prefer using IRIS from Christian Buil and to do to the work manually or to use more versatile tools like Photoshop or MaxIm DL. Exposures Composite & Stacked images This fourth composite technique is an hybrid version of the first. It uses different time exposure to record the full extension of the subject but without enhancing the resulting image with a mask. The second one merged a stack of numerous CCD images post-processed with an unsharp mask to enhance details. Both techniques are stunning by their resolution that exceeds the instrumental resolution. But scopes are not the only ones to glorify but rather the authors's performances who used all their skills to produce these marvelous pictures. Image processing software to download : ASTROSTACK - IRIS - REGISTAX
To combine multiple images most image processing software provide special dedicated tools which use arithmetic functions like adding, subtracting or multiply images. The principle consists to accurately register all images as explain earlier. Only then you can combine these images to create a composite. The resulting picture can be adjusted again using a judicious unsharp mask. Note that if you are picturing bright DSO's you can post-process your resulting image with a Lucy-Richardson or VanCittert algorithm while Maximum Entropy is useful on faint objects which exhibit a low signal-to-noise ratio. The isophote mapping technique allows you to extract lines of same brightness in images (equidensity) and optionally to attribute false color to the resulting isophotes. For years that was a tedious work in darkroom as explain in another page as we had to create contrasted masks, place them in sandwich with colored filters, repicturing the composite, etc. But today the computing revolution allow us to perform such tasks in a few mouse clic. Isophote or similar functions are included in some image processing software, from Christian Buil's freeware QMiPS32 or IRIS to expensive IMAGE-32 or MIRA software.
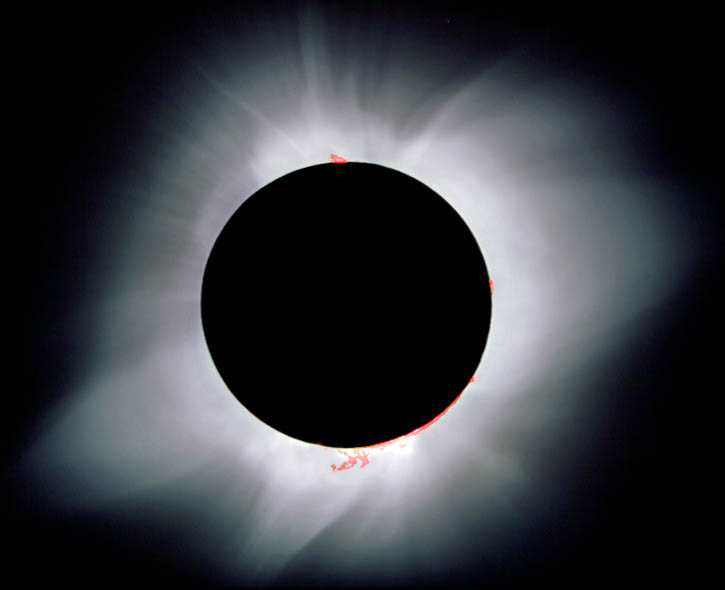
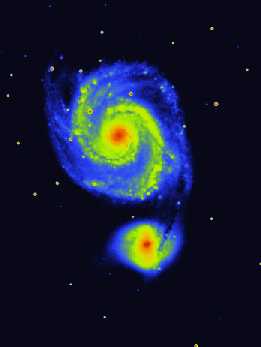
In this case, I used IRIS with a FITS image of M51 provided with the software (note that you can read FITS file with FITSview that allows you to save them in BMP). In IRIS, the procedure is accessible to a kid : select the appropriate function on the menu, set the dynamic threshold and press the false colors icon. Voilà, you get this marvelous images. In the same way other software provide a Rotational gradient filter suited to reveal details in radial structure objects such as comets or the sun corona. When isophotes and gradient filters are well selected, results are always amazing and beautiful, revealing features to the edge of the subject. Last chapter |
|||||||||||||||||||||||||||||||||||||||||||||||||||||||||||||||||||
|
|
||||||||||||||||||||||||||||||||||||||||||||||||||||||||||||||||||||


