|
|
MOSA COMMAND DEMONSTRATION
The MOSA command is used primarily to put together several shots of the same object in order to have a single image of this object. To illustrate the use of this command, we will create a mosaic from two wide field images of the moon: PLATO.FIT and COPERNIC.FIT (download and decompress the file MOSA.ZIP) . The first one covers the northern part of the moon; the other, the central part.
Let's look at these two images:
LOAD PLATO
VISU 3000 700
LOAD COPERNIC
VISU 3000 700
|
|
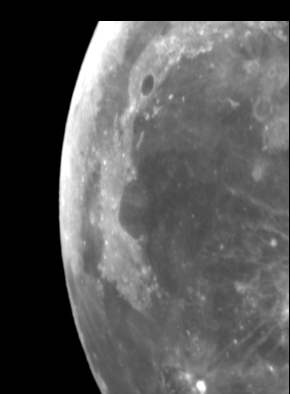
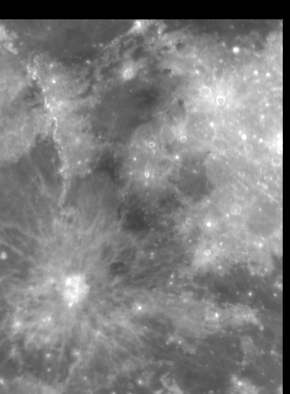
Plato region (left) and Copernic region (right).
The first thing to do is to find a well contrasted landmark that is common to both images. Here, this is the crater PYTHEAS, which is near the coordinates (274,151) on the image PLATO.FIT and near (4,138) on COPERNIC.FIT. These coordinates were found with the cursor.
The shift between the two images is:
· along X: 274 - 4 = 270 pixels
· along Y: 151 - 138 = 13 pixels
(note that the relative position between images can be a fractional number).
Now type:
LOAD PLATO
MOSA COPERNIC 270 13 0
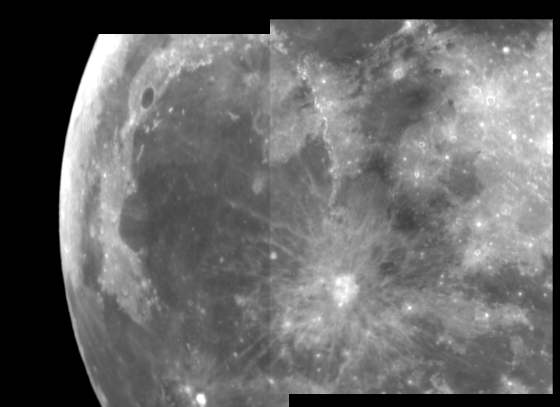
Result of the command
MOSA 270 13
0.
The overlapping zone is noticeable because the intensity level of the two images is not identical. To improve the result, reexecute the MOSA command, by setting the last parameter (overlap type) to 5:
LOAD PLATO
MOSA COPERNIC 270 13 5
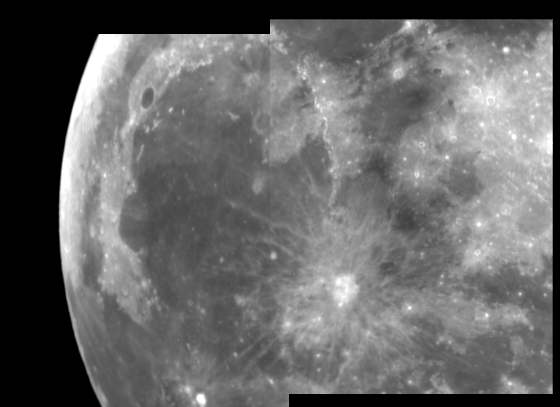
Result of the command
MOSA 270 13
5.
The value of the overlap type allows you to choose the state of the overlapping
zone in the final image:
Finally, it is of course possible to link several MOSA commands together to create very large mosaics from more than two images.
You can also use a dialog box for mosaic operations. For more details click here.
|
|
|