DEEP-SKY PREPROCESSING TUTORIAL
1. INTRODUCTION
2. PRODUCING
THE OFFSET MAP
3. PRODUCING THE
DARK MAP
4. PRODUCING THE
FLAT-FIELD MAP
5. PHOTOMETRIC
CORRECTIONS
6. REGISTRATION
OF IMAGES
7. COMBINING THE
IMAGES
8. CORRECTING
BACKGROUND NON UNIFORMITY
9. COSMETIC
CORRECTIONS
10. A FULLY AUTOMATED
PROCEDURE
11. DOWNLOAD DEMO IMAGES
1. INTRODUCTION
Long exposure CCD deep sky images are always distorted by three types of defects:
(1) During the exposure, a thermal interference signal builds up in each pixel while collecting the signal from the observed object. The CCD needs to be cooled to a cryogenic temperature (100K, or -173°C) to reduce this signal to a negligible level. Unfortunately, most CCD cameras suffer from the effects of this signal when they are only slightly cooled (temperature over -50°C). The principal consequence of the dark current (whose name comes from the fact that is it present even when the detector is in total darkness) is noise on the image. This noise has two origins:
- reading noise linked to instantaneous fluctuations when the information from each pixel of the CCD is read. The only simple way to reduce this noise is to acquire several images of the same object and then average them;
- spatial noise due to the fact that each pixel in the image reacts differently to the dark current, which gives a grainy aspect to the raw image. This difference in sensitivity to the dark current is strongly correlated from one image to another, so it is possible to produce a reference map of the interference signal to correct the images. The dark current map is obtained by the accumulation of many (typically 7 to 10) long exposure images taken in complete darkness. The CCD should be cooled as usual to reduce the reading noise.
(2) In addition to the useful signal, there is a DC offset that has a value that is independent of the integration time and somewhat independent of the CCD temperature. This offset is induced by the characteristics of the CCD output amplifier and of the electronics of the video signal processor. This signal can easily be eliminated by subtracting an offset map from the images to be processed. This map is obtained by averaging several images acquired with a minimum integration time in total darkness.
(3) The CCD pixels do not all have the same sensitivity to light. As a consequence, if the detector is illuminated with a uniform source, the resulting image will not necessarily be uniform. Just as for the dark current, a spatial noise that degrades the detectability and the photometric quality will be recorded. In addition, the telescope focus is never perfectly uniform because of optical vignetting or the presence of dust in the path of the light beam. These effects are like a local fluctuation in the gain of the CCD. This gain can be corrected for by dividing the images to be treated by the image of a supposedly uniform field. This image, called the flat-field image, is obtained at dusk, when the sky is still bright enough to get a relatively strong signal (between 1000 and 2000 levels) with a short integration time (between 1 and 30 second exposure). If it is too dark, the exposure time will need to be too long, and there will be unwanted stars on the image. In general, you would take 5 to 10 flat-field images and extract a median image (SMEDIAN command).
Let's process the image of the field of ARP97. They were obtained with the 24-inch Newton F/D=3.5 telescope of Pic du Midi Observatory (T60 telescope), a KAF-0400 CCD (2x2 binning) and 60-seconds for each individual frames (click here for download this images).
First, tell Iris where to access the images. Use the Settings window (from File menu), and then type the reference directory in the Working path section. For example, if the directory for your images is the WORK directory on C:, you will type:
C:\WORK
Validate your choice by typing the OK button.
Here are the contents of the images that will be used here:
(1) N_1.PIC...N_7.PIC : images of dark current. They were taken in total darkness with an integration time close to those used for deep sky images (even greater if possible). Here, the integration time was 60s.
(2) OF_1...OF_7.PIC : images of offset (bias) signal map. They were taken in total darkness with exposures time as short as possible.
(3) F_1.PIC...F_9.PIC : images of the sky realized just after sunset or just before sunrise. They will be used to generate the flat-field image that will correct the useful images from variations of sensitivity among the CCD surface.
(4) ARP97_1...ARP97_1.PIC : images to process.
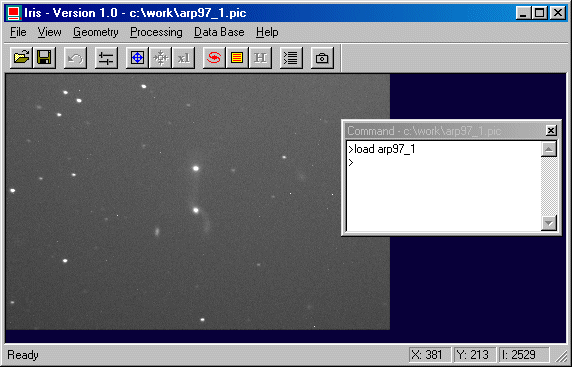
Visualize ARP97_1.PIC.

Note that:
(1) The dark current produces a fair amount of noise and hot pixels that is visible in the background;
(2) The background is not uniform and dust particles can be seen. These are typical flat-field defects.
The basic operation we will now make corresponds to:
![]()