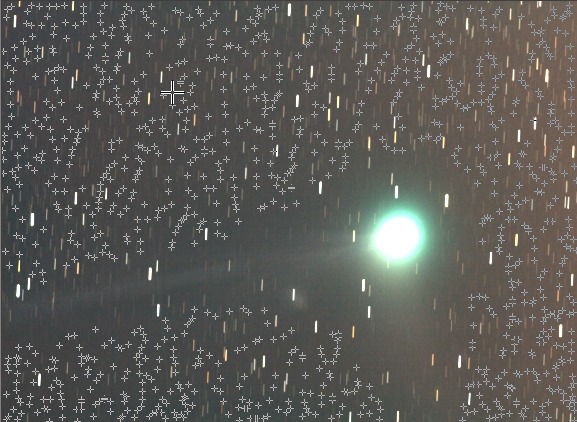
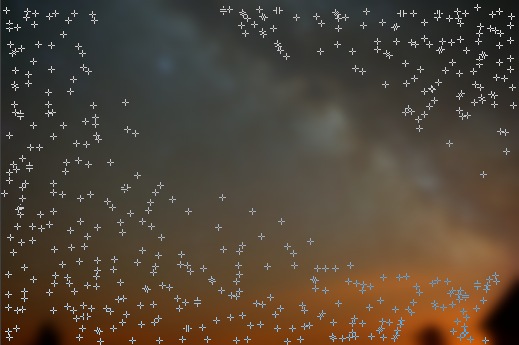
Result of the manual pointing. Each cross mark the position of pointing.
IRIS TUTORIAL
Remove the gradient of the sky background
Deep-sky gradient removal procedures (polynomial method)
Manual procedure
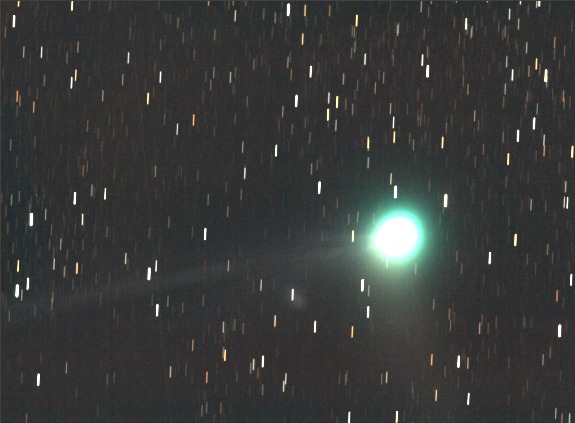
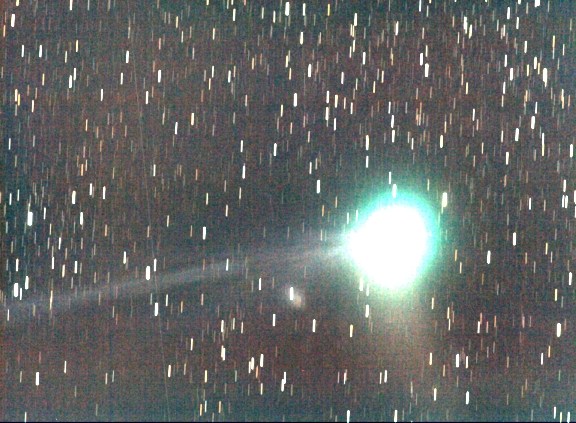
Load image to be processed (here an image of comet C/2004 Q2 - Machholz obtained on January 11, 2005 with a Canon EOS 20D camera and a telephoto lens Canon 400 mm f/5.6). You can download demonstration image COMET.PIC here (800 kb). Then type command POINTON (it does not have a parameter).
>POINTON
The mouse pointer aspect changes when it passes on the image. You have to select manually many points in the sky background. To carry out pointings make right click with the mouse. Avoid stars and comet. You can enter up to 3500 manual pointings.
Result of the manual pointing. Each cross mark the position
of pointing.
When the points are considered distributed uniformly and in a sufficient number, you can synthesize an artificial sky background, i.e. a synthetic polynom. But before, you must indicate to the software the degree of this polynom with command POLY. For example a 3rd degree, generally a good choice:
>POLY 3
To calculate the synthetic sky, run command SYNTHE (it does not have parameters):
>SYNTHE
Here, the result:

Save this background image in a temporary file, for example:
>SAVE SKY
Reload the image to be processed and subtract the synthetic fitted sky (we also add a constant of 500 to all the pixels for facilitate the visualization of faintest parts of the image):
>LOAD COMET
>SUB SKY 500
The result
To leave the pointing mode, type command POINTOFF:
>POINTOFF
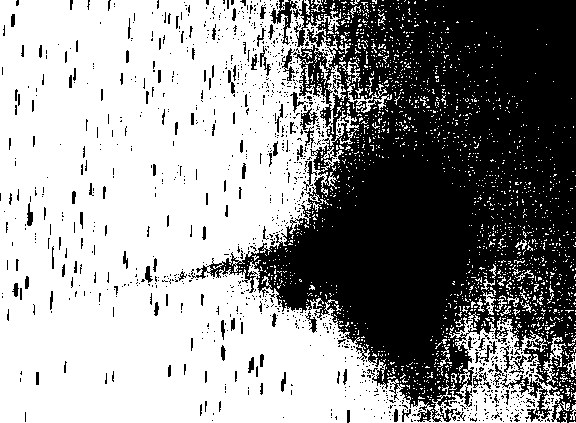
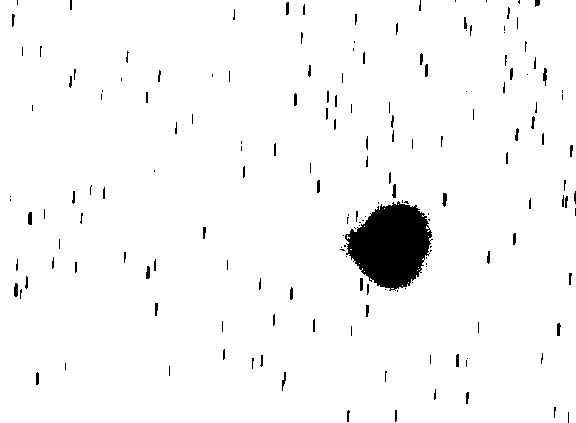
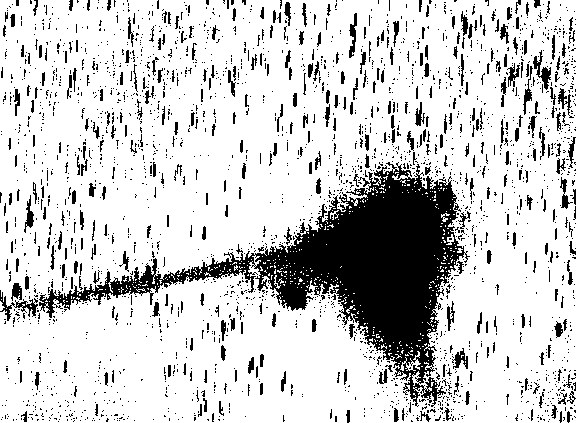
For better appreciate the quality of correction of the sky background, compare the image before and after sky flatening on a very high contrast and negative display (the images are first converted into black and white frames with the function 48 bits to 16 bits of Digital photo menu):
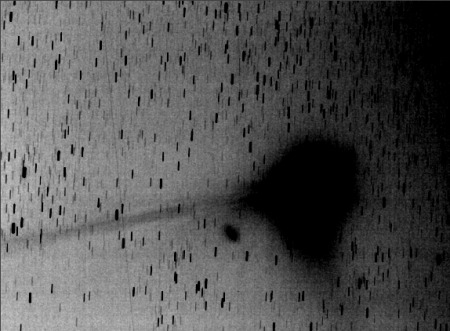
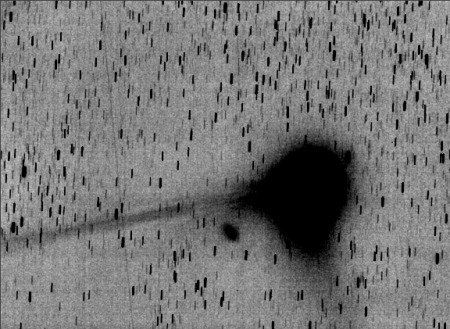
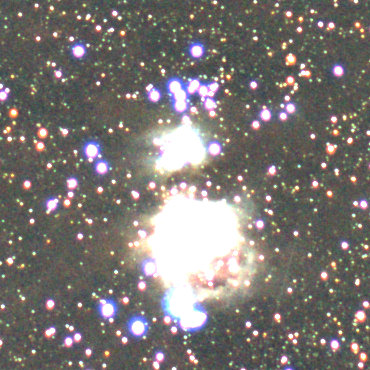
Left, before
the correction of the sky background. Right, after correction. The flattening of sky has well on an aesthetic interest,
but it is also significant to carry out precise photometric measurements. The
oval spot on the left of the coma is the diffuse nebula NGC1333.
Automatic procedure
The image to process:
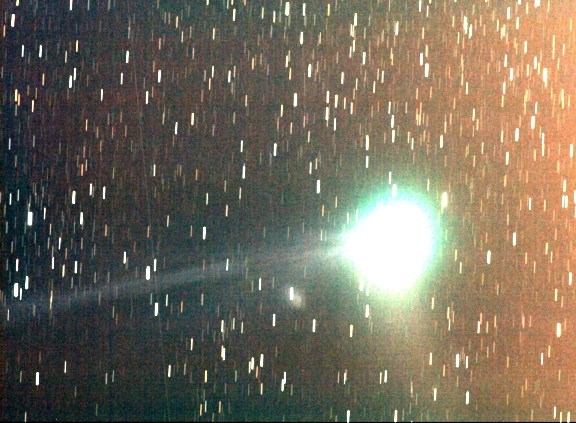
Image of comet C/2004 Q2 Machholz taken in urban condition (see here for details). The light pollution produce a significant and unpleasant large-scale gradients. Do not mistake this default with a flat-field error (i.e.sensibility variation along image). We correct here only additive errors (light added by the pollution for example). |
Step 1
Load the image and compute a mask for isolate the sky. The appropriate command for this is BIN_DOWN. The only one parameter of this command is the typical value of the sky background (use the mouse or the BG command for a first estimate). At this stage, try some values. For example
>LOAD COMET
>BIN_DOWN 620
A large part of the image is not used for the gradient calculation (dark part of the mask). The background noise is also in excess.
Try higher value for the sky level
LOAD COMET
BN_DOWN 750
Now, the threshold is too high because faint stars and faint extension of the coma faint are included in the computation of the synthetic sky.
The final tuning value for the mask...
>LOAD COMET
>BIN_DOWN 660
The background selection is optimal at this stage. Save the binary mask image on the disk. Example
>SAVE MASK
Step 2
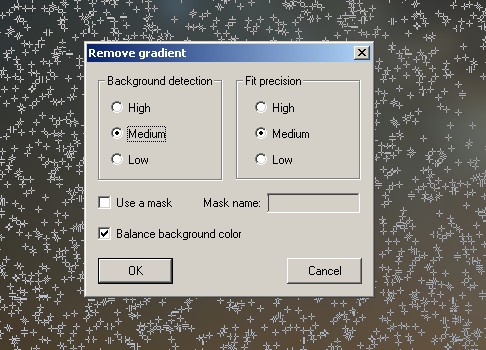
Load image to process and open the Remove gradient dialog box (Processing menu). Select the Use a mask option and enter the mask name:

The procedure now ignore the null values of the mask image during the computation of the synthetic background.
The Background detection parameter define the degree of differentiation between he sky region and the objets of the images. A low value correspond to a less sensitivity to subtle gradients near bright objects. But a low value reduce also the risk that a local feature, such as a faint arm of the galaxy or faint nebulae, will be flattened by the mathematical function (a 2D polynom). A high value can detect discrete gradients, but the algorithm can also include faint extension of a galaxies during the process, not selected by the mask. At this stage it is recommended to choose the medium value.
The Fit precision parameter define the precision of the fit of the sky (i.e. the degree of the polynomial function). For a first estimation, it is recommended to select the medium value (3rd degree polynomial function). So, only medium scale gradient are corrected.
Check Balance background color option: if the porcessed image is of 48-bits type, this option adjust each color channel so that the background is an even neutral tone (by adding or subtracting a constant value to each pixels in the image and for each color layer).Click OK. After computation modify visualisation threshold if necessary
Now the gradients have mostly been corrected. But if some residuals are present it is possible to run a second passes. This new passes is potentially more precise because it is more easy to define a representative and detailed mask of the sky background. First, save the first stage comet processing and compute a new mask image
>SAVE COMET2
>BIN_DOWN 655
Save the new mask, for example
>SAVE MASK2*
Reload the first passes image
>LOAD COMET2
We're ready to run gradient function again 
Setting the Background detection to high for detect faint gradient variation. Setting the Fit precision to high ensures that small-scale gradients will be corrected. Click OK
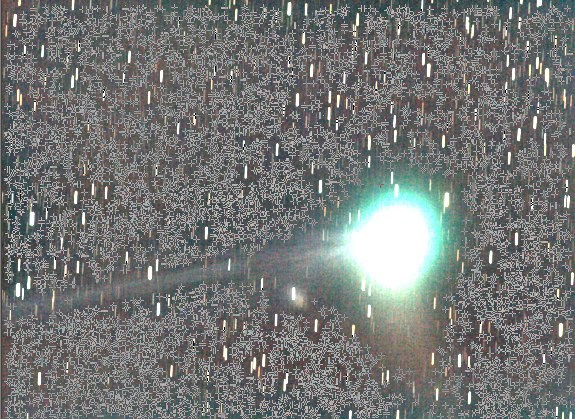
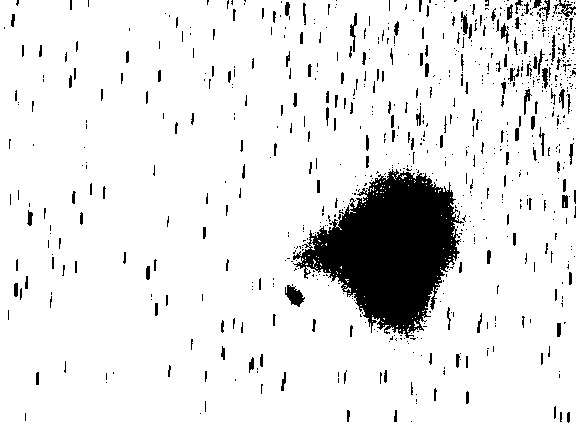
This
image shows the automatiquely selected points for background computation
(2000 points). The rejection
of the comet and stars is now correct.
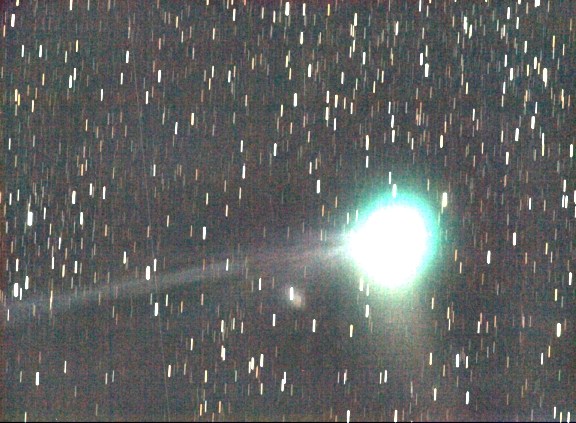
Modify the visualisation threshold value for see the final result. The background is now a flat, neutral and faints details are much more visibles:
Click here for another example.
Gradient removal on very wide field images
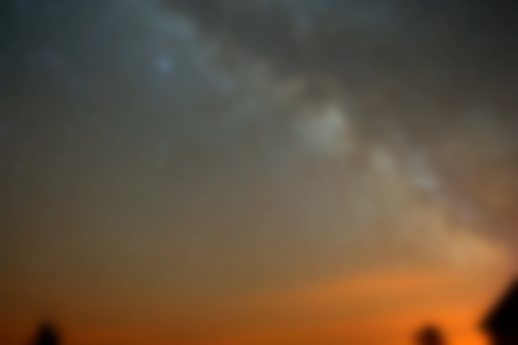
The image to process
>LOAD IMAGE
The
"image.pic" frame. Image credit Patrick
Bornet
Step 1: Blur the image
Run the Wavelet command of Processing menu, and set to unity value only the largest wavelet scale:
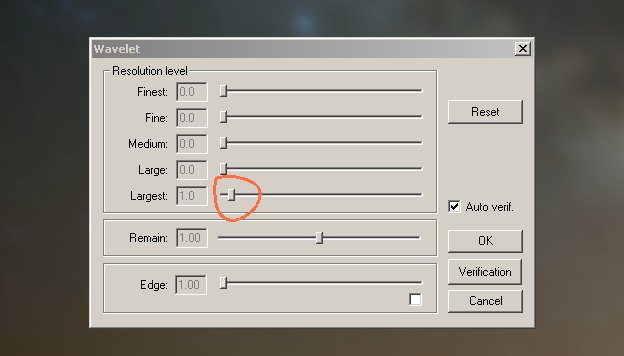
Click OK
Save this image:
>SAVE BLUR
Step 2: Make the synthetic background
>LOAD BLUR
>SUBSKY
>SYNTHE
>SAVE SKY
Or, run the Remove gradient function of the Processing menu
Ignore the displayed image and execute the console commands
>SYNTHE
>SAVE SKY

Aspect
of the sky.pic image.
Step 3: Remove the synthetic sky
>LOAD IMAGE
>SUB SKY 100
>VISU 180 50
The result
Manual method
For the present situation, a better method for fit the complex sky is the manual strategy
>LOAD BLUR
>POINTON
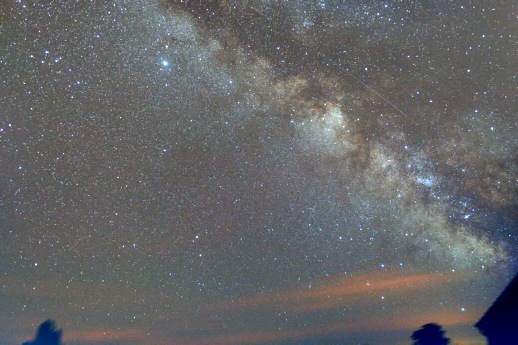
and select some points with the mouse (skip the Milky Way and house umbra):
Then:
>SYNTHE 3
>SAVE SKY2
>POINTOFF

>LOAD IMAGE
>SUB SKY2 100
>VISU 180
50
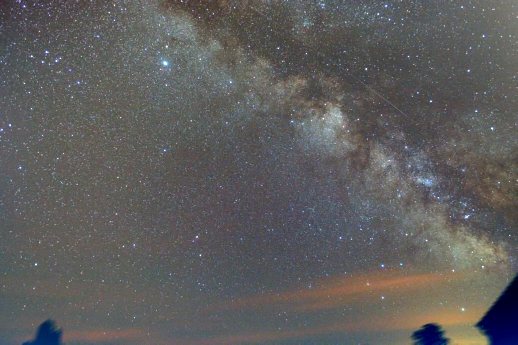
The final result
Tips: For make a larger blur of an image you can also use the commands MEDIANF ot RING_MEDIAN for example
Below, successively, the start image and final image at original scale
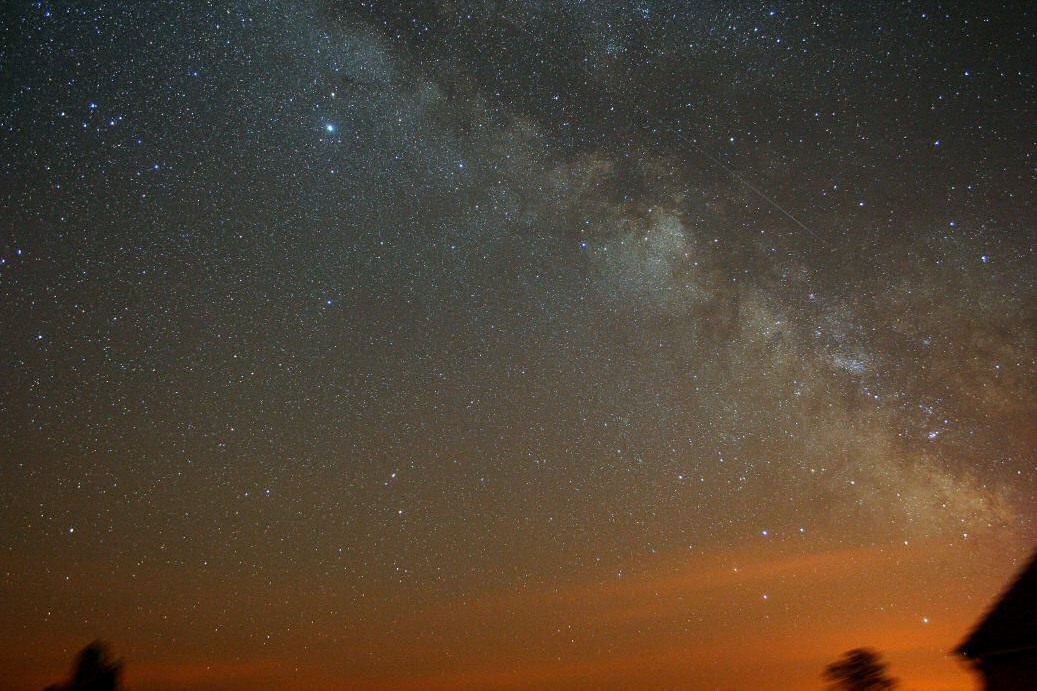
The
start image.
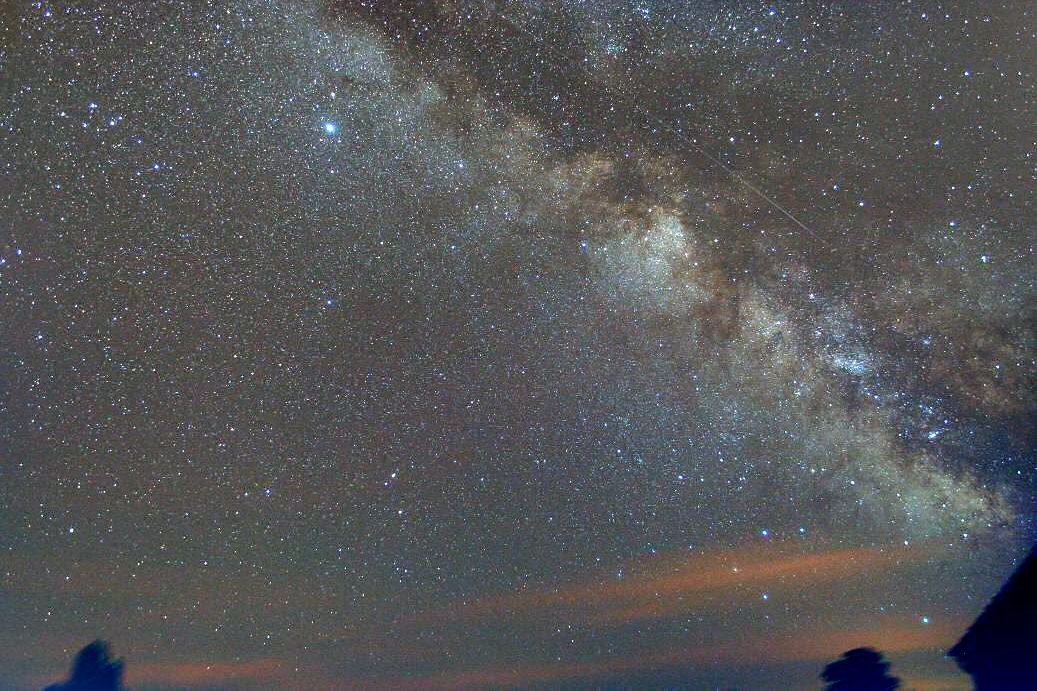
The
final image.
Tip: The command BIN_DOWN is useful for generate a mask image. The symetric command exist, i.e. BIN_UP command. The syntax is BIN_UP [VALUE]: The pixels having an intensity higher than [value] take value 255. The other pixels take value 0.
A scientific application of BIN_DOWN: Evaluation of the area of the sunspots (tip: for a precise result, do not hesitate to flatness the photosphere image by use the command SUBSKY if necessary).
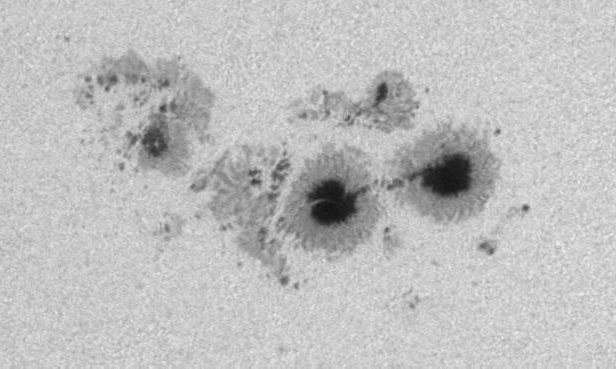
A
sunspot group (image Valerie Desnoux, click
here for more informations)
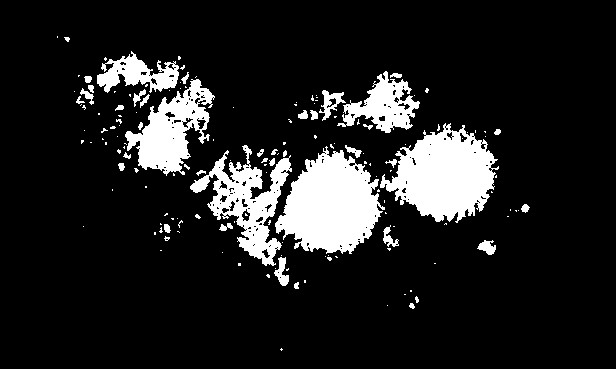
The
group after command BIN_DOWN 165 (select umbra
+ penumbra).
Reload the original. The command COUNT_DOWN 165 give the area of isophotal selection (here 29470 pixels).
Deep-sky gradient removal procedures (local method)
Full moon, light pollution, amplifier glow, vignetting in the optical system, ... can cause a large variation in the background across the image. Iris can use a classical polynomial fit of the gradient (up to 5th order). An intelligent search of background areas is implemented, and also the possibility to use a selection mask for identify only pertinent parts of the image (outside stars, nebulae, galaxies, etc). The created artificial image contain only the smooth background. This artificial image is subtracted from your image and the gradient is eliminated.
The polynomial fit is very efficient but in some situation the method fail. It is the case when the variations of the sky are brutal and of great amplitude. For these situations Iris v5.41 introduces a new method using a local estimator of the sky background. A mask is necessary for identify bright objects and large nebulae because it is not easy for the software to determine areas containing only background.
The new flatten background command name is SUBSKY3 :
SUBSKY3 [SIZE] [MASK NAME]
The function is also accessible from Processing menu and command Remove gradient (local estimator)...
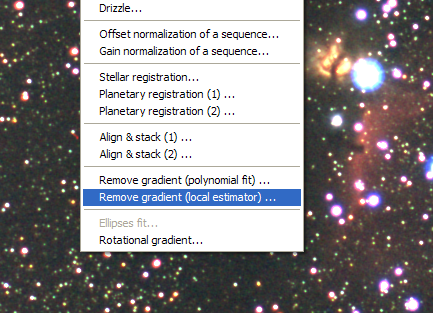
The syntax is simple. Two parameters should be provided. The first is the size of the local zone for the calculation of background. It is necessary to choose a dimension larger than the size of the objects present in the image. For example, if the typical dimension of a galaxy is of 60 pixels, you will choose a zone of nearly 100 pixels. The second parameter is the name of the mask for the selection of the background areas.
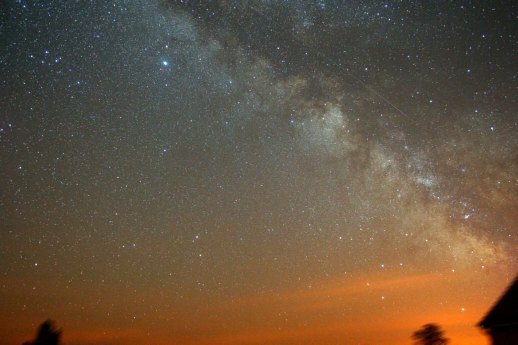
For example, the image below is the sum of 7 exposures exposed each one 2 minutes with a Canon EOS 350D camera (Baader filter) and equipped with a Canon lens 50 mm f/1.2 stopped to f/1.8. The lights of Toulouse town illuminates the horizon and affect the image severely. The constellation of Orion was not very high in the sky at the time of the observation, which does not arrange anything.
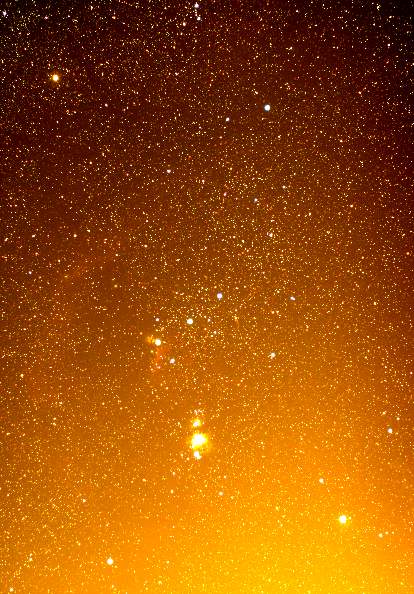
The state of art of preprocessing of RAW Images is applied (offset dark, flat-field) but the gradient is always severe.
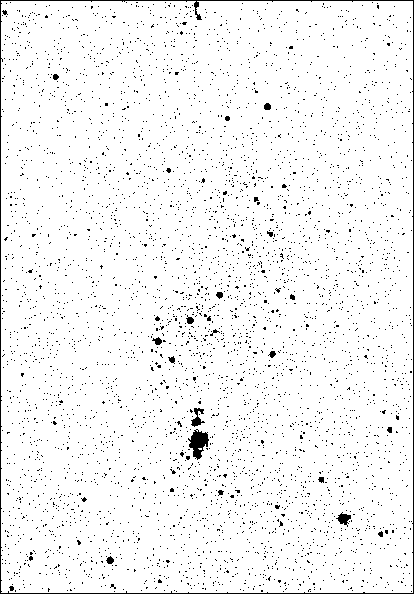
First, create the mask for isolate bright objects. Use the command BIN_DOWN. Starting with the image to process in memory
> BIN_DOWN 3800
The result is a binarized image in which all the initial intensities lower than 3800 are put at zero, and other values take the level 256.
Here a satisfactory mask, in which the real objects are correctly insulated:
Now try
> BIN_DOWN 3500
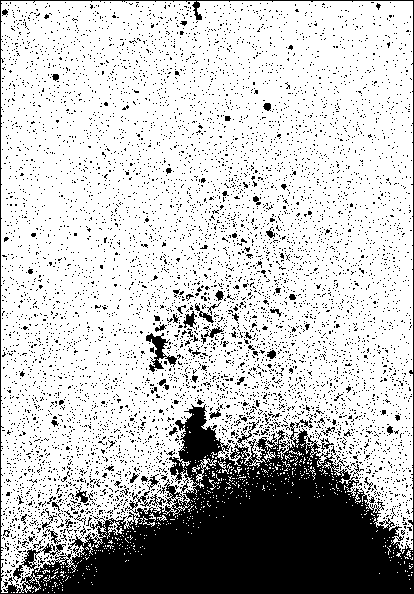
The masked zones (in black) take a too large importance. In particular, the sky background is not defined in the lower part of the image. This mask is not valid.
Save a good mask in the working directory
> SAVE MASK
Note: to obtain a mask which selects all the pixels of image run the command > FILL 256.
Reload in memory the image to be process, then:
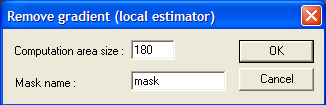
> SUBSKY3 180 MASK
or from the dialog window
Remember, the first parameter is the characteristic size of the largest objects of the image. Successive tests are necessary to select the value which does not create a artifacts around the bright and large objects. If a problem appears, increase the calculation zone size.
|
|
|
Next image, the result of the processing. The gradient removal success reveals weak objects of the image. Moreover, the white balance of the background is obtained simultaneously. The only other processing carried out here is a slight gamma stretching (see Gamma adjustment... command of View menu). Improvement compared to the starting document is considerable.
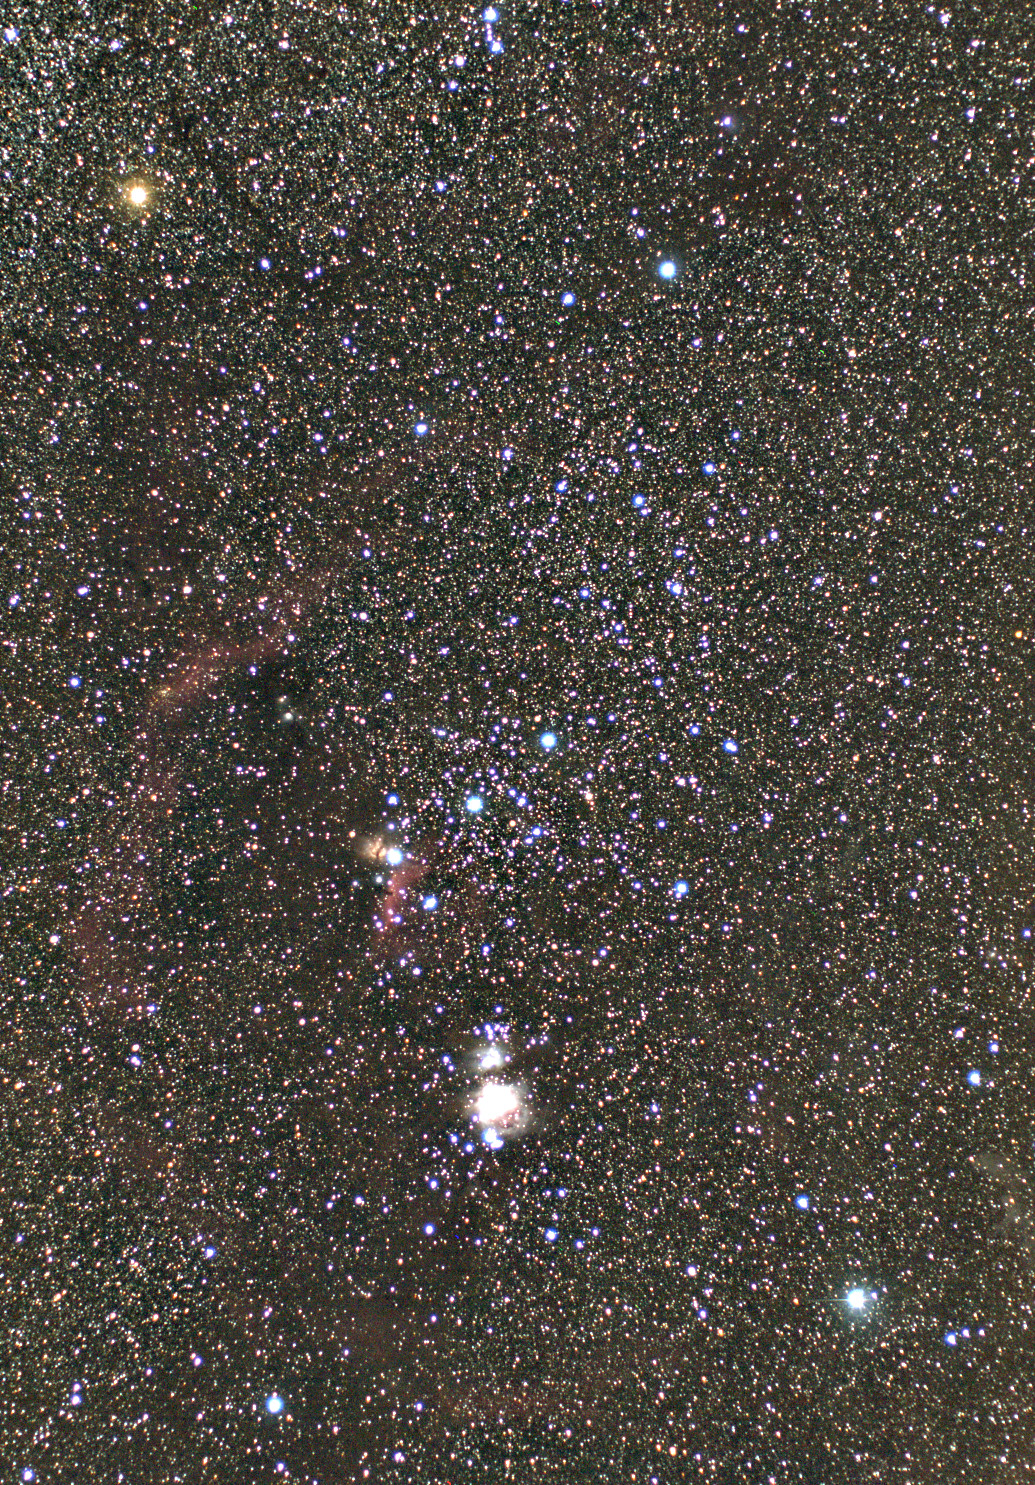
Click
on the image or here for download the
large version.
For more details about the photographic lens Canon 50 m f/1.2,
click here.
A side effect of the algorithm used is a black border around the processed image (the wide of the border is nearly equal to the size of the calculation zone divided by two). Use commands like WINDOW, WIN, ... for crop the image.
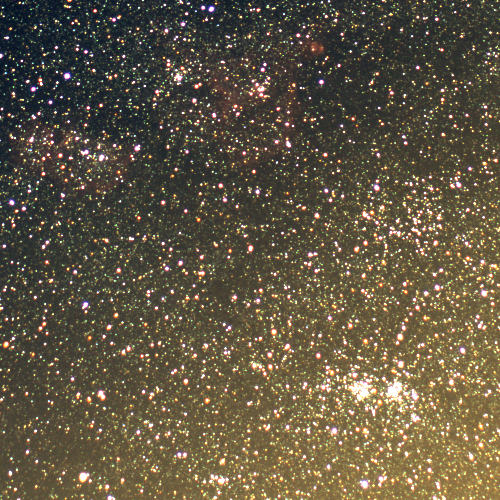
Another example, also starting from images taken with a 50 mm lens (Perseus double cluster region) :
|
|
|
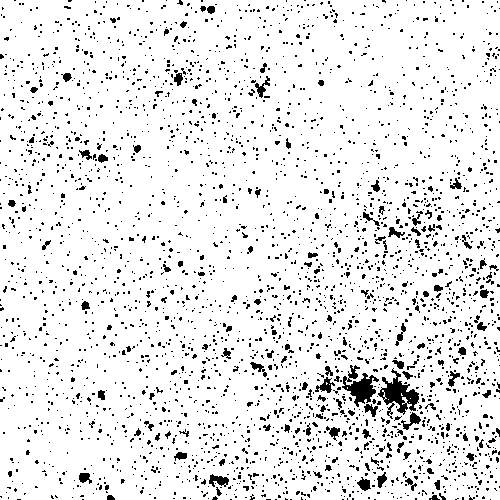
Left, the starting image, right, the adopted mask.
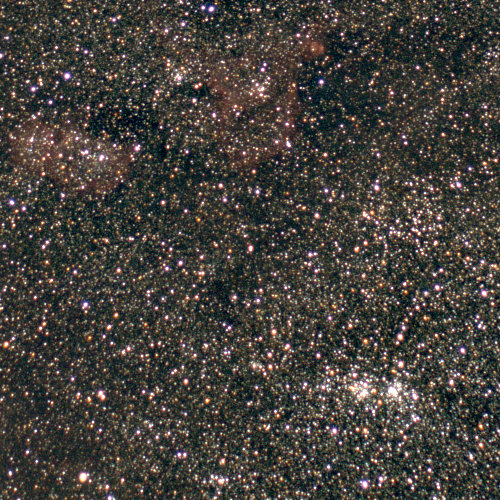
The image after gradient removal procedure (local estimator
method).
The polynomial fit method (nearly a global method) is not very efficient here because the density of stars is too significant for find the correct sky background level.