New features of versions 5.33 & 5.34
Version 5.34 - October 9, 2006
Add of deconvolution methods
Iris V5.34 add a public convolution Fourier domain function, ideal for test image restoration problems. The command name is FCONV.
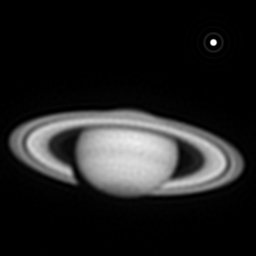
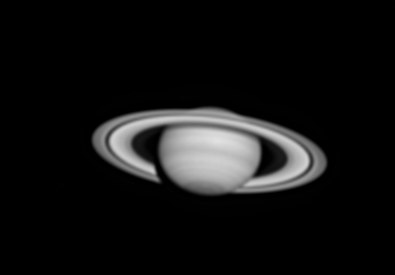
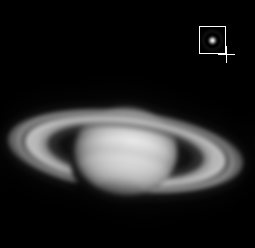
Consider the following image of Saturn planet :
It is the test image, at a "perfect" resolution (assimilated to an infinite spatial resolution).
Before Fourier transform operation a good idea is to promote the image to a size equal to a power of two (128, 256, 512, 1024, ...). The command WINDOW3 is the ideal tool for this. Select an area near the center of the image (use the mouse pointer):
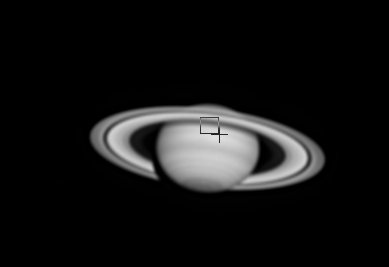
Only the center of the selected area is important here - not the size. Run the WINDOW3 command:
>WINDOW3 256

The size of the new image in memory is of 256 x 256 pixels. Click here for download a copy a the image. Save the result, for example:
>SAVE PLANET
Create a blank image of the same size. Use for example the commands
>FILL 0
or
>NEW 256 256
Make a blur function. Here we simulate the airy image produced by a 200 mm telescope and a central obstruction of 0.33. The image scale is supposed of 0.1 arcsec per pixel. The central intensity of the airy image is normalized to 5000 count unit. Finally, the wavelength is of 0.55 microns. Execute the DRAW_AIRY command:
>DRAW_AIRY 256 256 5000 200 0.33 0.55 .1
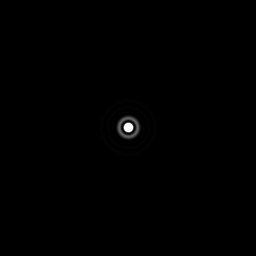
A
high contrast view of the computed synthetic Airy stellar image.
Save the Airy image. For example:
>SAVE AIRY
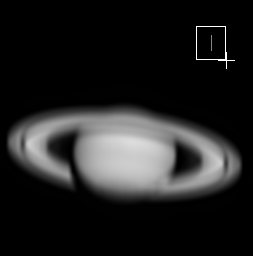
Now convolve the Saturn image and the Airy image:
>FCONV PLANET AIRY
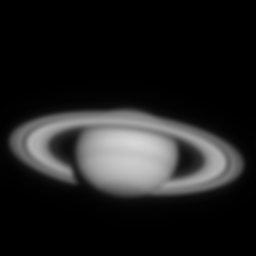
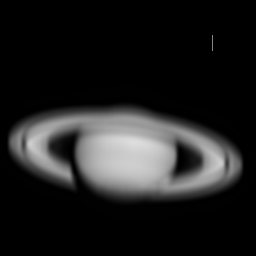
The
blurred image of Saturn (diffraction effect of the telescope).
Store on the disk the burred version of Saturn planet:
>SAVE BLUR
The following operation is done:

where g(x) is the result of the FCONV
command (the observed telescopic image of Saturn), p(x) characterizes
the imaging system - the point spead function (PSF), here the Airy disk, and
f(x) is the original image. The symbol  denote the convolution operation.
Note, the command >FCONV AIRY PLANET is theoretical similar to >FCONV PLANET AIRY, but for internal normalization reason, the second one is preferred.
The syntax of FCONV is
FCONV [IMAGE] [PSF]
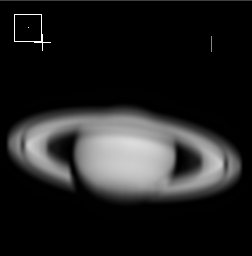
The well know deconvolution command RL (Richardson-Lucy algorithm) can be used for recover the original image. But the processed image field must be contain an image of the PSF (a star for example). Here we synthesize an ideal artificial star:
>LOAD AIRY
>TRANS 85
85
>ADD BLUR
>SAVE BLUR
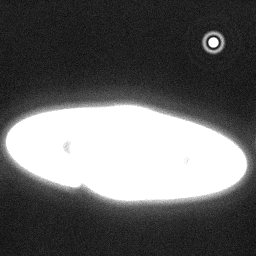
Here the resulting image (note the presence of the PSF in the upper corner):

Click
here for download the blurred image.
Before run the RL command, select the PSF with the mouse
Now for example 50 iteration with a relaxation factor of 0.5:
>RL 50 0.5

The version 5.34 add the Wiener inverse filter. The form of the filter is

where P is the Fourier transform of the PSF, P* is its conjugate value and k is a constant. The constant k fix the degree of low frequency in the restored image (and the importance of the noise). If k=0, a pure inverse filter is applied, but the amplification of the noise can be considerable. Choose k between 1 and 0.0001.
The syntax of the Wiener filter command is
WIENER [K-PARAMETER]
The only one parameter of the command is the value of the k parameter.
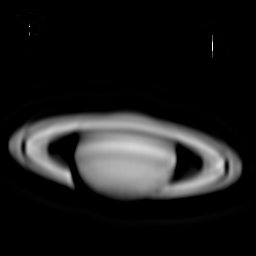
Load the image to be restored
>LOAD BLUR
and select the PSF
Try the command
>WIENER 0.001
Here the restoration after a Wiener filtering

The presence of the noise is very critical during the deblurring process. Add noise to the burred image:
>LOAD BLUR
>ADDNOISE
10 2
The RMS value of the white noise added is of 10 count. The electronic gain of the camera is assumed to 2 electrons by unit count (i.e. some photon noise is also added).
Save the noisy blurred image (a more realistic image):
>SAVE BLUR2
High
contrast display of the noisy blurred image.
The importance of the "k" parameter:
|
|
|
|
For k=0.1 the deconvolution is incomplete. For k=0.001 the noise is amplified.
Iris implement also a incremental version of the Wiener filter for a better control of the resolution and noise, the WIENER2 command. The syntaxe is
WIENER2 [ITERATION #] [K-PARAMETER]
ITERATION # parameter is the number of iteration of the process. K-PARAMETER is the standard Wiener noise parameter.
Reload the blurred image, select the star, and
>WIENER2 50 1

Result
of the incremental Wiener restoration of a noisy image.
It is easy to simulate a motion blur. First create a motion "vector":
>NEW 256 256
>PUT 122 128 5000
>PUT
123 128 5000
>PUT 124 128 5000
...
...
>PUT 135 128 5000
>PUT
136 128 5000
>SAVE MOTION

The
motion PSF i.e. a simple uniform segment. The length of the segment is
equal to the motion amplitude.
Now, generate the motion blurred image of Saturn planet:
>FCONV PLANET MOTION
>SAVE
BLUR3
and add the PSF into the burred image:
>LOAD MOTION
>TRANS 85
85
>ADD BLUR3
>SAVE BLUR3
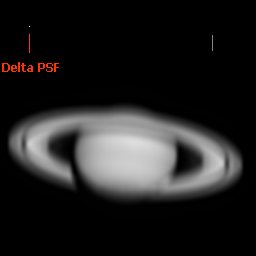
The
vertical blurred image + the added PSF (click here
for download).
Now the Wiener filtering is applied to the motion blurred image
|
|
|
|
Note: Search the optimal "K" value by successive try.
Note: the restoration functions RL, RL2, MEM, VANCITTERT, WIENER, ... are now compatible with 48-bits images (true-colors).
Iris V5.34 implement a (very) experimental blind deconvolution algorithm. Blind deconvolution consist to find a degraded image without requiring prior determination of the instrumental PSF. Iris use an iterative blind deconvolution based on the Wiener filtering and include nonnegativity, support contrains and noise relaxation. The operation is complex, a ill-posed problem and time consuming. The algorithm can be instable, the convergence not garanted and more than one solution is possible for the observed image or/and the PSF. The selection of the initial PSF model is critical. Reserve tests to small sub-images (256x256 or 512x512 pixels). But blind deconvolution is fascination field!
Add at the motion blurred image of Saturn an artificial star consisting to a single point (a delta funtion). The corresponding PSF is far from the real PSF.
>LOAD BLUR3
>PUT
30 230 8000
>SAVE BLUR4
The syntax of BLIND command is
BLIND [ITERATION #] [K-PARAMETER] [RELAXATION]
The [RELAXATION] parameter limit the importance of the noise. The typical values of relaxation parameter is beetwen 0 and 2. In most greneral situation RELAXATION=0. The PSF solution is stored in the image @PSF.
Select the isolated point-like PSF, then
>BLIND 200 .2 0
|
|
|
|
See also here more informations about deconvolution functions of Iris. See also the commands FFTD, FFTI, FCORREL, and periodic pattern removal methods here.
NEW COMMANDS
FILL_INV [VALUE]
Give
the intensity [value] at the pixels located outside a selection rectangle.
WORK [PATH]
Definition
of the working path from the console. Example
>WORK C:\MYIMAGES\SESSION21
Version 5.33 - September 17, 2006
Improvement of acquisition functions for digital cameras
The DSLR concerned are the Canon EOS.
Capacity to control the acquisition by using the standard USB link was added for exposure times lower than 30 seconds. You can thus control your EOS without employing a specific interface (your computer is now a powerful intervalometer). However, for take exposure higher than 30 seconds with Iris, the QuickRemote USB interface remains necessary.
For example, for a 1/100 second exposure, use the M mode of the DSLR (Manual mode), then enter the exposure time in the Acquisition dialog box (Digital photo menu), then click on the GO button, it is all:
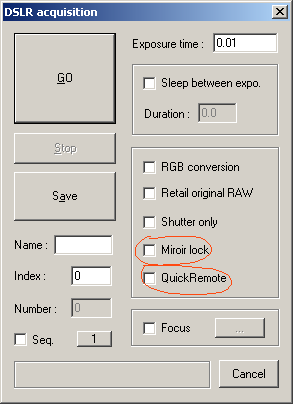
Check the button QuickRemote for use the QuickRemote interface.
For lock the mirror of the DSRL 3 seconds before exposition, select the corresponding function. The QuickRemote is necessary and select the mirror locking option in the personal function of the DSLR.
All the other possibilities of the DSLR acquisition are kept identical. See here for more details.
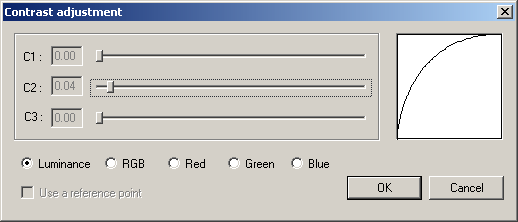
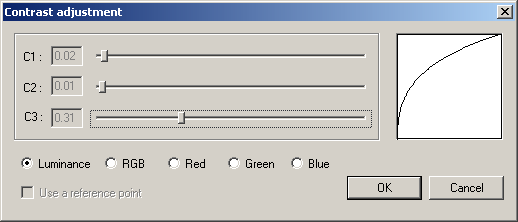
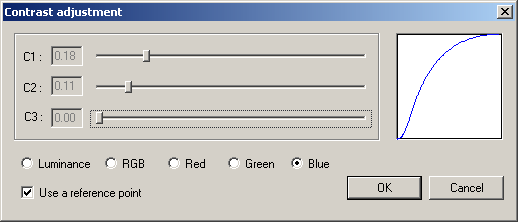
Addition of a function for adjust the contrast
Open the Contrast adjustment dialog box from the Visu menu.
You can adjust the tonal luminance of the image in memory, modify the contrast of the RGB layers simultaneously (option RGB) or act on the color layers individually. The Luminance option is of the most general use (neutral color result).
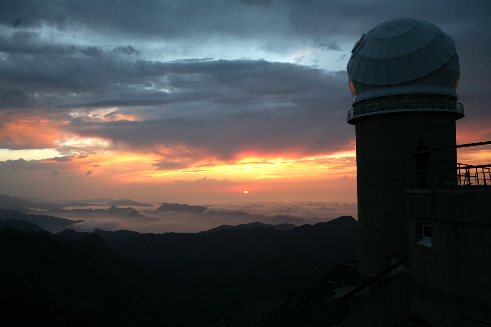
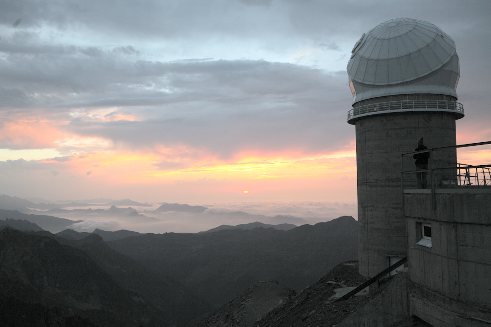
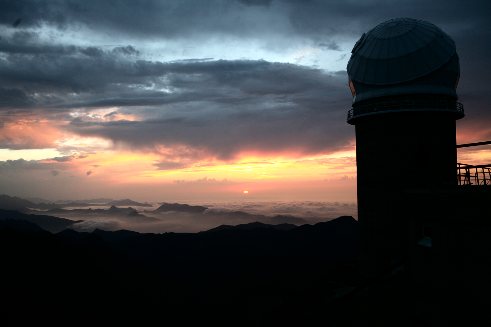
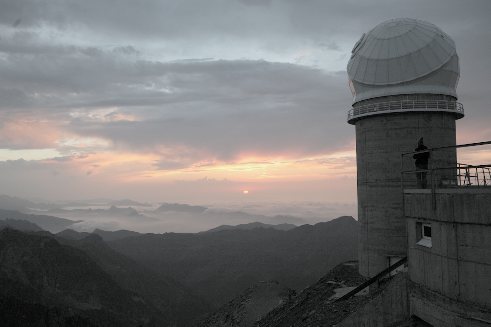
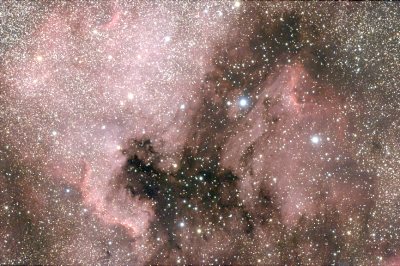
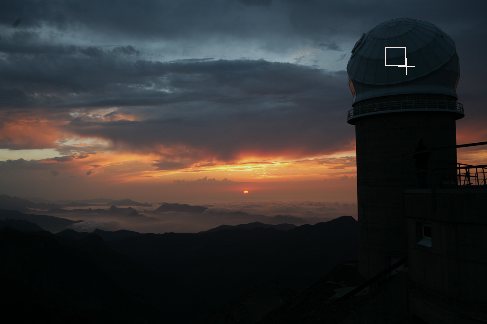
The image to be corrected.
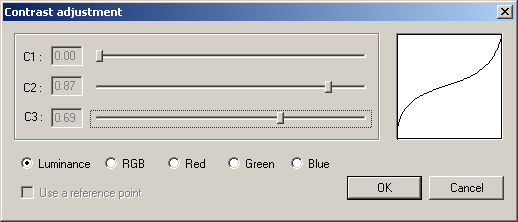
Some manipulations (the graph shows relation between the input intensities - the horizontal axis - and the output intensities - the vertical axis):
|
|
|
|
|
|
|
|
|
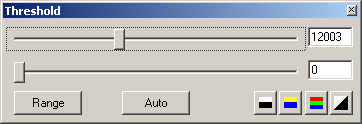
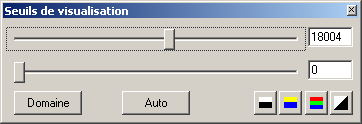
The position of the visualization thresholds before adjustment
is significant because the modification of the image intensities is effective
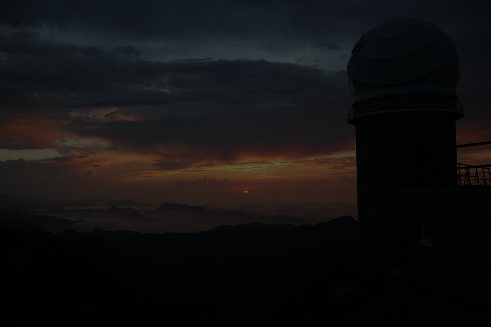
only between the high and low threshold. For example, modify the threshold:
|
|
|
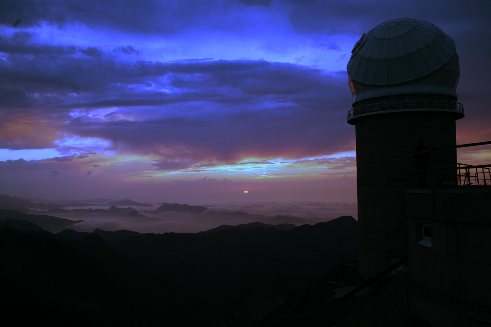
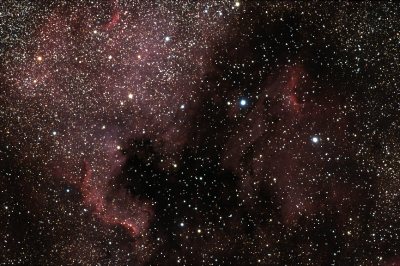
... and you can obtain new effects (here a lower saturation):
|
|
|
Before run the command, you can select a zone of the image which will keep the same dial tone after modification of the image. Select the "neutral" area with the mouse:
Then, check the option Use a reference point and modify the color balance by using the R, G and B slider:
|
|
|
The white balance of the selected area is not modified.
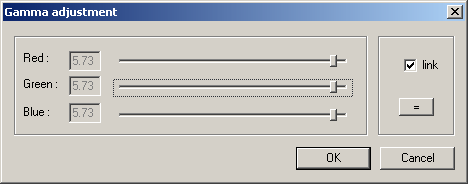
Improved gamma adjustment function
The action on gamma is a simple and effective method for display all the parts of a contrasted image. Open the Gamma adjustment dialog box of Visu menu:
Some tests:
|
|
|
|
|
|
The saturation of the colors is less marked in this last case. It can be a wanted effect, but you can also enhance this saturation by using Saturation adjustment tool of Visu menu. The position of the visualisation threshold is important before run the gamma tool. For an optimal result, not hesitate to increase the distance between the two thresholds before adjusting gamma. For example:
|
|
|
Display of a reticle in the video window
It is possible to display dynamically a reticle in the video window (Preview command of Video menu).
For display a crow into the video image, enter the command:
>R_START
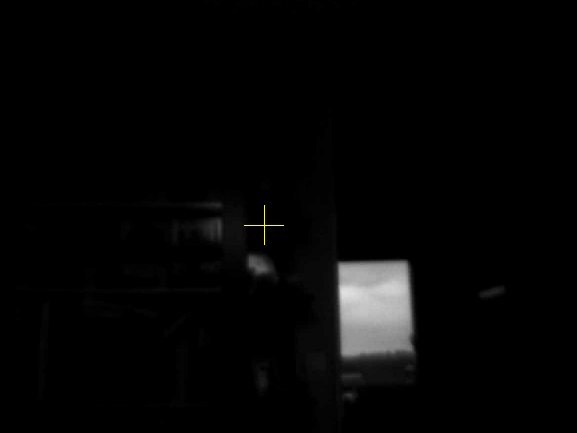
To position the reticle, make a double click with the left button of the mouse in the desired part of the image.
You can change the size of the reticle with command R_SIZE. For example:
>R_SIZE 100
You can modify the color by providing the values R, G and B in this order with the command R_COLOR. For example, to display the reticle in the red color:
>R_COLOR 255 0 0
For erase the reticle:
>R_STOP
Others
A bug was fixed during the automatic preprocessing of DSLR RAW images for Nikon models.
Iris can decode RAW images of the Canon EOS 400D (Rebel XTi). Select the 5D/20D... model in the camera setup dialog box.
Add of the SCAN2PIC3 command (a spectroheliogram construction family command - see Lhires 3 spectrograph documentation).
|